403 forbidden page template compatible with PrestaShop
Explore Similar TemplatesAbout template
Build and integrate high-converting 403 forbidden page templates with PrestaShop effortlessly!
Recommended templates


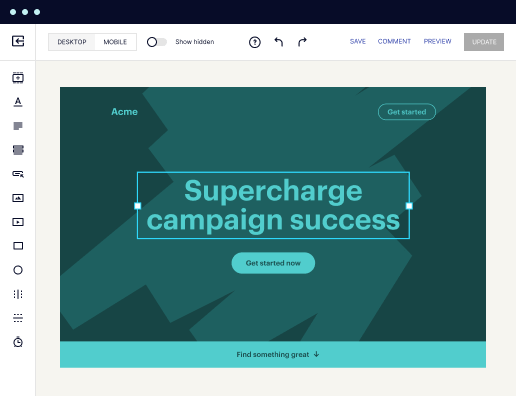
Easy to build without coding
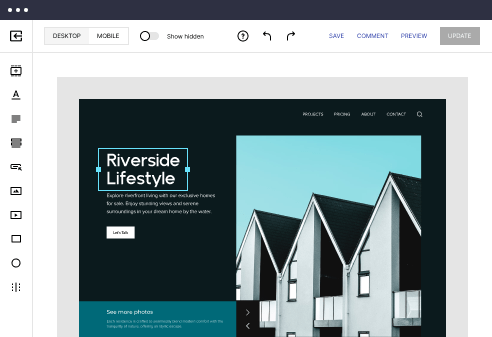
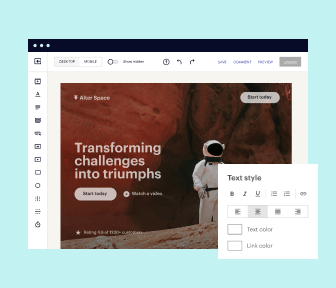
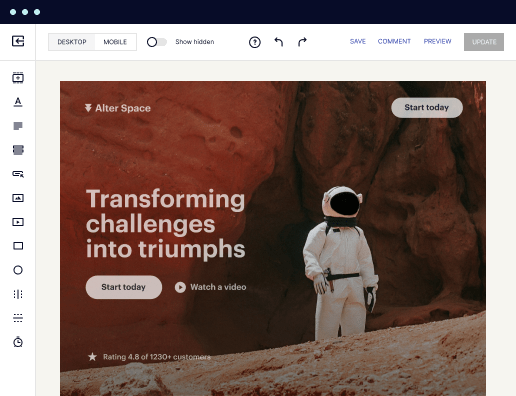
With the intuitive drag-and-drop builder, anyone on your team can create high-converting pages without any knowledge of code or design. Make enhancements to your landing page with custom widgets using Javascript, HTML/CSS, or third-party scripts.

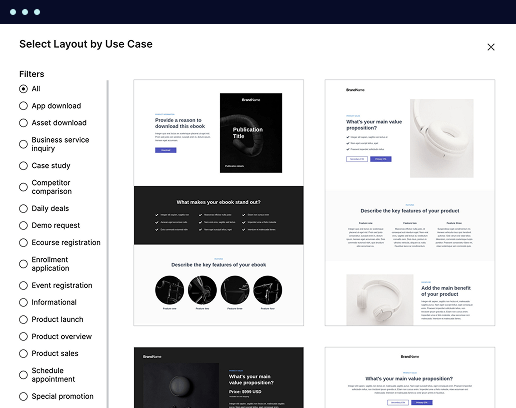
Multiple layouts for any industry and goal
Select from 500+ landing page layouts built to boost conversions across industry-specific scenarios. Customize them by adjusting fonts, adding images, and generating on-brand content with the AI assistant. Quickly scale with Instablocks® and Global Blocks that you can save, reuse, and update globally.
Loads fast and looks polished on any device
Every template is responsive, which means they present professionally on any device and load blazingly fast with our Thor Render Engine. You can also power them up with Google AMP technology to deliver an unparalleled mobile experience and drive higher conversions.
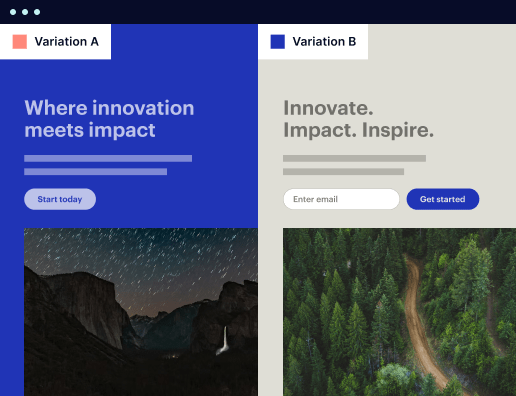
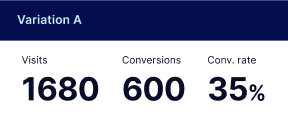
Robust analytics & experimentation
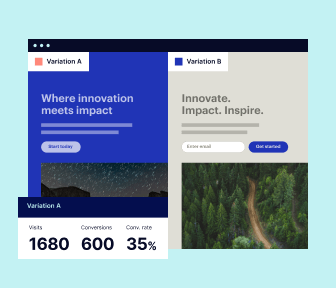
Get real-time updates and reporting across all your devices, showing the number of visitors, conversions, cost-per-visitor, and cost-per-lead. Launch AI-powered experiments, run A/B tests, and use heatmaps to analyze user behavior, then optimize your landing page to maximize conversions.

Easy to build without coding
With the intuitive drag-and-drop builder, anyone on your team can create high-converting pages without any knowledge of code or design. Make enhancements to your landing page with custom widgets using Javascript, HTML/CSS, or third-party scripts.
Multiple layouts for any industry and goal
Select from 500+ landing page layouts built to boost conversions across industry-specific scenarios. Customize them by adjusting fonts, adding images, and generating on-brand content with the AI assistant. Quickly scale with Instablocks® and Global Blocks that you can save, reuse, and update globally.
Loads fast and looks polished on any device
Every template is responsive, which means they present professionally on any device and load blazingly fast with our Thor Render Engine.
Robust analytics & experimentation
Get real-time updates and reporting across all your devices, showing the number of visitors, conversions, cost-per-visitor, and cost-per-lead. Launch AI-powered experiments, run A/B tests, and use heatmaps to analyze user behavior, then optimize your landing page to maximize conversions.
All the features you need to build lead-generating landing pages

Landing page builder
Easily create landing pages with the intuitive drag-and-drop page builder that features contextual element editing, over 500 page layouts, and 33 million images.

Visual on-page collaboration
Invite teammates and clients to collaborate on page design in real time to get your pages created, reviewed, and launched faster.

AI content generation
Instantly generate audience-focused content with AI-crafted headlines, paragraphs, and CTAs directly within the Instapage builder.

500+ customizable layouts
Choose from a range of professionally tailored page layouts, specifically designed to enhance conversion rates across numerous industry-specific scenarios.
Instablocks
Quickly build personalized landing pages using individual page blocks that you can customize, save, and reuse.
Thor Render Engine
Our back-end technology ensures that your landing pages load quickly to increase conversions, SEO rankings, and enhance the overall user experience.
Analytics
Seamlessly connect to Google Analytics to get real-time updates on cost-per-visitor and cost-per-lead metrics directly in the Instapage platform.
Learn how to build top-performing landing pages for any goal
FAQs
“Instapage gives us the ability to tailor our landing page content and layout to tell a unique story for each geographical target. The platform also enables us to create different variations with content that performs well for each unique channel. Every marketing team needs this!”

"Instapage has truly maximized our digital advertising performance by enabling us to offer matching, personalized experiences for every ad and audience. Now we can scale our landing page experiences as efficiently and effectively as we scale the ads themselves."

"If we have to wait on a developer, our creative velocity plummets. But Instapage has made it possible for us to exponentially grow our advertising programs and convert more customers"

Leading the way in building high-performing landing pages


Maximize your marketing strategy with Instapage's powerful landing page platform
Instapage provides the most robust landing page and conversion rate optimization (CRO) solutions, tailored to help marketers enhance their digital marketing campaigns. Whether you're targeting business services, tech, education, or other sectors, effective landing pages can drive higher engagement and ROI. Here’s a step-by-step guide to utilizing Instapage for your campaign success.
Understanding the power of Instapage
Instapage stands out as an all-in-one platform that significantly augments marketing strategies. By leveraging over 100 customizable templates and intuitive lead generation tools, you can create high-converting landing pages fast. The importance of optimizing every aspect of your landing pages cannot be overstated; studies show that increasing conversion rates by just a few percentage points can lead to substantial revenue gains.
- Access to over 100 high-converting templates makes design effortless, ensuring that even those without technical skills can launch effective landing pages.
- Built-in lead generation elements help marketers capture vital data without the need for extensive technical setups.
- Responsive designs optimize pages for mobile and desktop users, catering to all visitors and enhancing user experience.
Step 1: Create your landing pages effortlessly
Begin your journey with Instapage by creating landing pages that align perfectly with your campaign goals. A user-friendly drag-and-drop builder allows for rapid page development. Follow these steps:
- Select a template that suits your campaign: With hundreds available, find one that resonates with your target vertical.
- Utilize Instablocks for speed: These reusable blocks speed up page creation by allowing the use of previously designed sections.
- Integrate lead capture forms seamlessly: Add forms directly within your page to start collecting leads immediately.
Step 2: Optimize your landing pages for conversion
After your pages are up, it's time to focus on optimization. Instapage provides powerful features to ensure peak performance.
- Employ A/B testing: Compare variations of your landing page to discover which elements convert better.
- Use heatmaps: Understand user behavior on your pages, which sections attract clicks, and where visitors drop off.
- Leverage analytics tools: Continuously monitor page performance to make data-driven improvements.
Step 3: Personalize for maximum impact
Lastly, ensure your content engages each unique audience by utilizing Instapage's personalization features.
- Dynamically replace text based on visitor segmentation, ensuring that messages resonate with different audience types.
- Customize ads aligned with specific landing pages utilizing AdMaps, improving relevance and response rate.
- Track audience-level metrics to gain insights into how different segments behave and adjust your strategies accordingly.
In conclusion, Instapage transforms the way marketers approach landing page creation and optimization, making it easier to drive results and scale campaigns effectively.
Ready to elevate your digital marketing efforts? Start using Instapage today to build impactful landing pages that boost your conversion rates and ROI.
People also ask about 403 forbidden page template compatible with PrestaShop
403 Forbidden page template compatible with PrestaShop
Understanding the 403 Forbidden error in PrestaShop
When navigating the landscape of web development, encountering errors is an inevitable part of the journey. One particularly perplexing status code is the 403 Forbidden error. Simply put, this error occurs when a user tries to access a resource or webpage that their server settings do not permit them to view. HTTP status codes serve as a communication method between browsers and servers, indicating the result of a request. The 403 error stands out as a restriction, warning users that permission is denied.
For e-commerce platforms like PrestaShop, understanding the implications of a 403 error is crucial. If customers encounter this error while trying to access products or checkout pages, it can lead to frustration, loss of sales, and a negative brand perception. Thus, recognizing and addressing the 403 error is essential for online store owners who aim to provide a seamless shopping experience and maintain customer trust.
Common causes of 403 Forbidden errors in PrestaShop
403 Forbidden errors in PrestaShop can arise from several common issues, many of which stem from server-level configurations. Let's explore these primary causes to help you identify the root of the problem more efficiently.
File permission issues: Incorrect permissions set on folders or files can restrict access, preventing users from viewing content they are authorized to.
Misconfigured .htaccess file: This hidden file plays a crucial role in server configurations. If poorly set, it can inadvertently block access to certain paths.
Blocked IP addresses: Firewall settings or server configurations might restrict certain IPs, leading to access denials.
Password protection misconfigurations: Improperly configured password requirements can inadvertently lock out users who should have access.
The importance of a custom 403 Forbidden page template
A custom 403 Forbidden page template transcends merely displaying an error message. It presents an invaluable opportunity for online merchants to enhance user experience, even when faced with access issues. Informing customers about the setback without further frustrating them cultivates goodwill and maintains professionalism.
Additionally, a well-designed custom 403 page strengthens brand identity. By maintaining visual elements consistent with your overall site design, you prevent confusing customers who instinctively look for your brand elements, easing the impact of an error message. Custom templates can also redirect users back to functional parts of your site, such as product categories or support channels, engaging them and potentially mitigating lost revenue.
Designing an effective 403 Forbidden page template for PrestaShop
Creating a 403 Forbidden page template involves incorporating certain key elements that will ensure it is both informative and visually appealing. By doing this, you not only inform users about the error but also guide them towards next steps.
Clear explanation of the error: Use simple language to indicate that the page they are trying to access is not available to them due to restrictions, emphasizing that this isn't their fault.
Next steps for users: Provide clickable links directing them back to the homepage or product categories, along with support contact tips.
Contact information: Include support email addresses or live chat options to facilitate quick assistance for those needing further help.
Visual branding: Maintain consistency with your main website's look and feel through custom graphics and visual elements that represent your brand.
Integrating the 403 Forbidden page in PrestaShop
Integrating a custom 403 Forbidden page in PrestaShop isn't overly complicated. Here’s a straightforward guide to ensure your new template functions flawlessly and resonates with your customers.
Upload your custom 403 template: Begin by placing your HTML file into the appropriate theme folders within the PrestaShop directory.
Activate your template: Navigate to PrestaShop's back office, ensuring your web server correctly points to this new template as the default for the 403 error.
Test functionality: Simulate a 403 error by trying to access restricted areas before confirming everything functions as intended.
Troubleshooting common issues with 403 Forbidden pages
After implementing a custom 403 page, users need to know how to troubleshoot any arising issues effectively. Some common problems can disrupt user experience, and recognizing them early allows for a quick resolution.
Error page customization not displaying: Ensure you have uploaded your template to the correct directory and that file permissions allow the server to access it.
Compatibility concerns with themes: Some themes may override 403 error handling. Check settings to ensure compatibility.
Inconsistent 403 error triggers: Investigate server logs to pinpoint whether security settings or permissions lead to inconsistent blocking patterns.
User-submitted solutions and community insights
The PrestaShop community is an invaluable resource. Users often share their experiences, solutions, and insights gained from handling 403 Forbidden pages. Engaging in forums allows you to explore numerous fixes and strategies based on real-world scenarios.
It's essential to contribute to this communal knowledge pool. By sharing your own solutions or questions, you not only foster a sense of collaboration but also potentially uncover unique insights that may aid fellow merchants encountering similar difficulties.
Best practices for managing 403 Forbidden errors
Preventative measures can significantly reduce the occurrence of 403 Forbidden errors in PrestaShop. Being proactive allows store owners to maintain a seamless shopping experience for their users and ensures operational efficiency.
Regular audits of file permissions: Periodically assess files and directories to ensure permissions remain suitable and do not inadvertently lead to access denials.
Monitoring and managing IP address blocks: Routinely review blocked IPs to ensure legitimate users are not mistakenly restricted.
Keeping .htaccess files properly configured: Regular updates and optimisations can help prevent mishaps that lead to 403 errors.
Analyzing the impact of a well-designed 403 Forbidden page on business
The consequences of a 403 Forbidden error page extend beyond the immediate user experience. A thoughtfully designed error page can significantly influence user retention and overall conversion rates. Research suggests that well-communicated error messages prevent negative sentiment and keep users engaged with the brand.
To illustrate, case studies featuring businesses that improved user experience through custom error pages showcased notable increases in user engagement. These brands often reported lower bounce rates and higher trust levels post-implementation. Therefore, investing in user-friendly error messaging and design isn’t just good practice — it can bolster your business's bottom line.
Looking ahead, trends in e-commerce error management point towards greater emphasis on user experience during errors. Innovations geared towards personalizing communications during these interactions are on the rise. For instance, incorporating chatbots to assist users upon encountering an error can enhance user experience and leverage data for continual improvement.
Ready to skyrocket conversions?
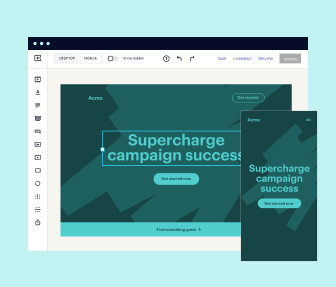
Supercharge your ad campaigns with high-performing landing pages
Get started