
The best campaigns start with prospect data: who your visitors are, what they’ve done, how to reach them next. The trouble is, getting and using that data can cause all kinds of problems for your team, and even your potential customers.
JavaScript tags on the back-end of web pages are what enable marketers to leverage information about their visitors. Think the Meta Pixel or Google Ads Conversion Tracking. They’re useful, but manually setting them up and maintaining them is tedious. Copying, pasting, fine-tuning small lines of code and ensuring they’re in the right place — it’s just another thing to worry about — especially with many campaigns and pages. That’s why there’s Google Tag Manager.
What is Google Tag Manager?
Google Tag Manager is a system for easily managing tags on the back-end of web pages. Through an intuitive interface, users can update and add tags without needing to deploy or manipulate additional code.
Why use Google Tag Manager?
Every software that integrates with your website needs its own space on the back-end of your web pages. For remarketing, heat maps, even simple conversion tracking. JavaScript makes it all run. And the more data you collect the more you need to revisit those tags — to add, update, and remove them. Google Tag Manager simplifies the process. But that’s not the only reason to use it.
Pros of using Google Tag Manager:
- Boost site speed: Because Google Tag Manager makes it easy to maintain tags, it also makes it easier to speed up your website by scrapping ones you no longer need. Google Tag Manager also loads asynchronously, meaning a web page does not need to wait for Google Tag Manager to load before loading its content.
- It has the flexibility to allow you to tweak tags to your specific needs to track a variety of behaviors. Simply choose a tag and pick from pre-set triggers to determine when it fires. Or, create your own.
- You can use Google Tag Manager with mobile apps as well as websites and AMP pages too.
- Error tracking and a preview mode make it easy to catch issues before they go live. Without these checks, human error comes into play often, which can result in a downed website.
Cons of using Google Tag Manager:
- There’s a learning curve. Google Tag Manager isn’t as simple to get started as some claim. That said, it’s ultimately easier than getting into the back-end of your web pages to adjust your tags frequently.
Beyond the learning curve, Emma Franks, Digital Marketing Account Manager at Hanapin Marketing, has this to say:
Many big-name PPC platforms (e.g. Facebook, Bing Ads) use the custom HTML tag option because GTM doesn’t have native integrations for them.
How to use Google Tag Manager
There are three components of Google Tag Manager: tags, triggers, and variables.
Tags
Tags are snippets of JavaScript that you can place on the back end of your website to perform a specific function. These are, as mentioned above, pieces of code that can retarget visitors or track conversions. They can measure scroll depth or send out behavioral emails and much more. Today, there’s not much tags can’t do. Among the most popular are tags from Google Analytics, DoubleClick, and WordPress.
Triggers

In Google Tag Manager, tags fire based on user events. You specify which events those are. Types of triggers to choose from include: pageview, click, element visibility, form submission, history change, JavaScript error, scroll depth, timer, YouTube video, and custom events.
Variables
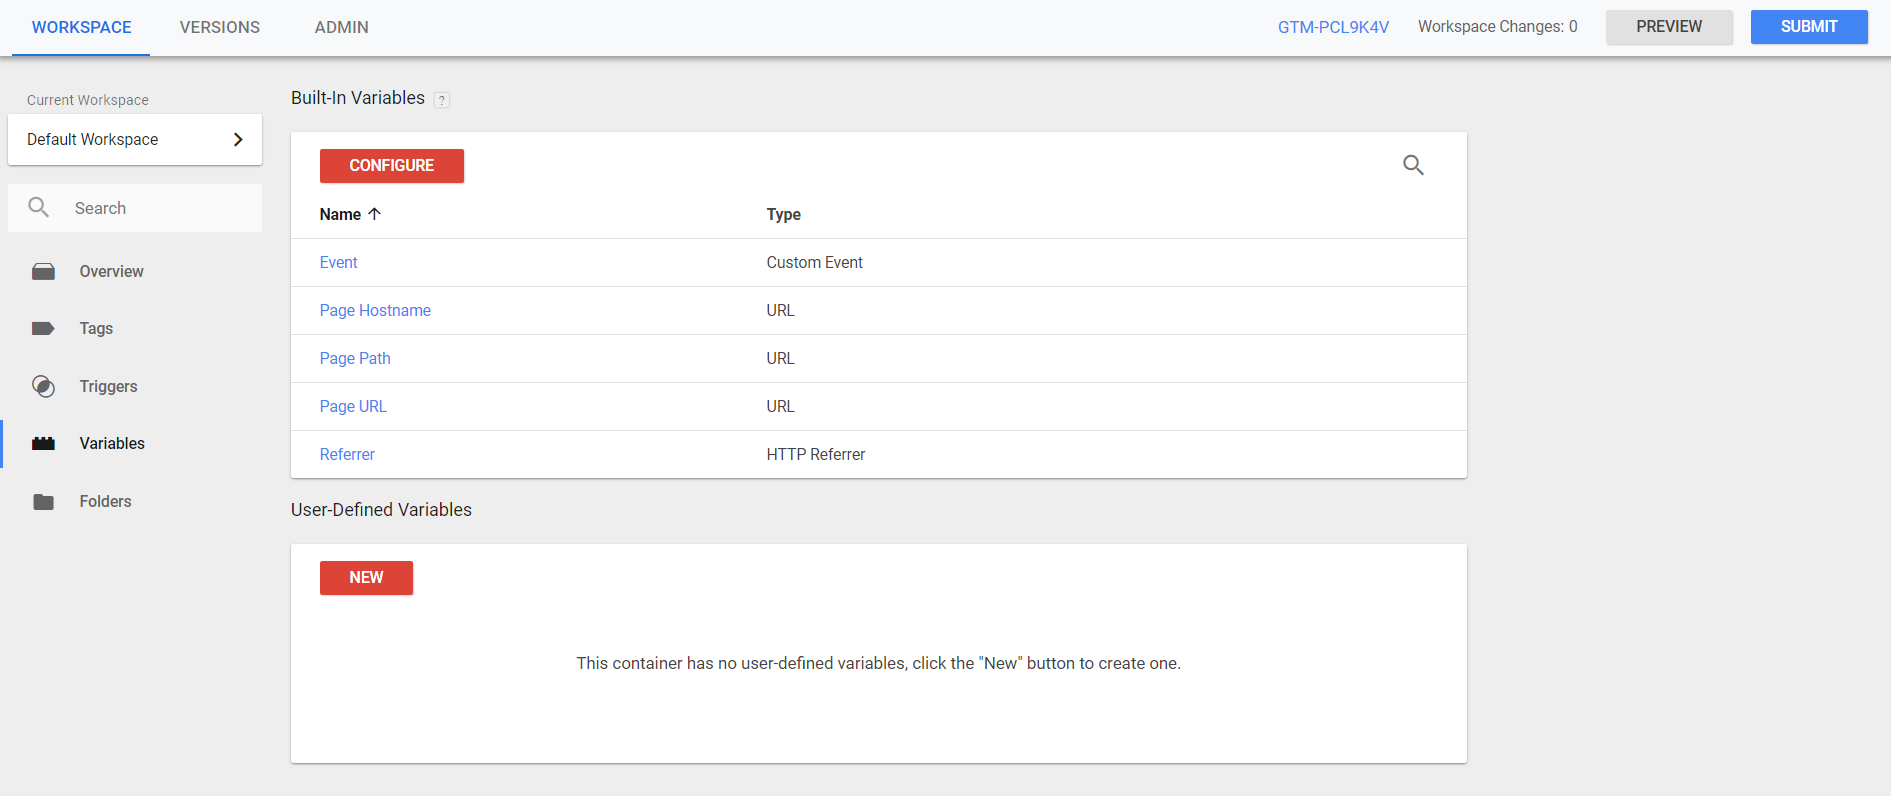
These are conditions that give a tag additional information it needs to fire. Google offers an example:
Let’s say that you want to fire a remarketing tag whenever a visitor spends more than $100 on your site. To implement this, create a pageview trigger and add this trigger condition:
Transaction Amount greater than $100
Since the variable “Transaction Amount” doesn’t exist, you would need to define it. You would tell Google Tag Manager to look for the value of Transaction Amount in a JavaScript variable transactionAmt (assuming this JavaScript variable is present on the purchase confirmation page of your website).
In this example, when a user spends money on your website, GTM will evaluate whether it’s above $100. If it is, the remarketing trigger will fire.
Containers
Together, a group of tags, triggers, and variables is called a container. A container sets the rules for a particular domain. Once you’ve set up your tag, trigger, and specified any variables, you have a container. With a container, you’re free to manage — add, update, remove — tags for your domains without continuously returning to the back-end of each page.
Preparing to implement Google Tag Manager
Implementing any tool takes preparation. For Google Tag Manager, here’s what you’ll want to consider:
Who will manage the account?
Too many users in Google Tag Manager adding and manipulating tags has the potential to down a webpage. Make sure you have one or two roles assigned, and protocol in place if the manager(s) of the account leave or can no longer handle their responsibilities.
How will it be managed?
Once team members have been assigned, it’s important to specify workflow. Even the smallest error can render a tag useless, or worse, interfere with other software. You may want an administrator to double-check the manager’s implementation, or to start an audit log to ensure that errors are caught and prevented in the future.
Who else might need access?
Your business may have a GTM administrator, but would anyone else need access? Maybe you outsource work to an agency that may need to add tags to some post-click landing pages. Maybe you employ a freelancer to run heat map analyses or create retargeting campaigns. If this these sound familiar, you may want to allow them access to your Google Tag Manager account and have your designated in-house manager check their work.
How many domains will you use GTM for?
If you’re managing tags with GTM for more than one domain, Google recommends using the same container for all of them, except for the following instances: First, if you need to tailor your tags to each domain. Once a container is published, it’s applied to all domains. So if you need to apply changes to one and not another, it’s best to use multiple containers. Second, if the configurations are different — if tags fire under different circumstances on different domains — you may want to use multiple containers, as configurations are not easy to share between domains.
Have you studied up on Google Tag Manager?
Google Tag Manager is touted as an easy-to-use DIY tool, but Orbit Media’s Amanda Gant says it’s misunderstood:
Google Tag Manager is not “easy” to use without some technical knowledge or training (courses or self-taught). You have to have some technical knowledge to understand how to set up tags, triggers and variables.
The truth is, while Google Tag Manager makes managing tags easier, it’s not something you can pick up without any prior education whatsoever. That’s not to say you need to register for an expensive training course, this one from Google should be more than enough to get you started.
Do you have manually coded tags on your page already?
A container will replace manually coded tags on a web page, like ones from Google Ads, Google Analytics, and other third-party providers. Google recommends that, when you elect to use Google Tag Manager, you migrate all your tags at once instead of leaving some in limbo. It’s not mandatory, as GTM can fire your tags regardless, but it’s a best practice. The more JavaScript on your page, the slower it will load.
Setting up Google Tag Manager
To get started setting up tag manager, Google outlines the following steps:
Create a new account and container
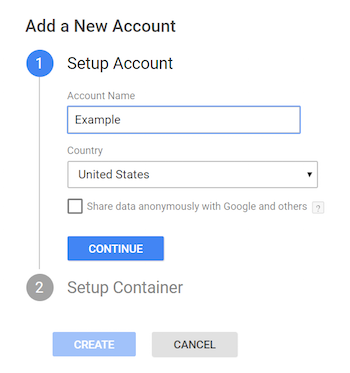
- In Google Tag Manager, click “Accounts” and then “Create account.”
- Input an account name and choose whether you’d like to share data anonymously with Google and others.
- Click “Continue.”
- Enter a descriptive container label and specify the content type from the following: Web, AMP, Android, or iOS.
- Click “Create.”
Install the container
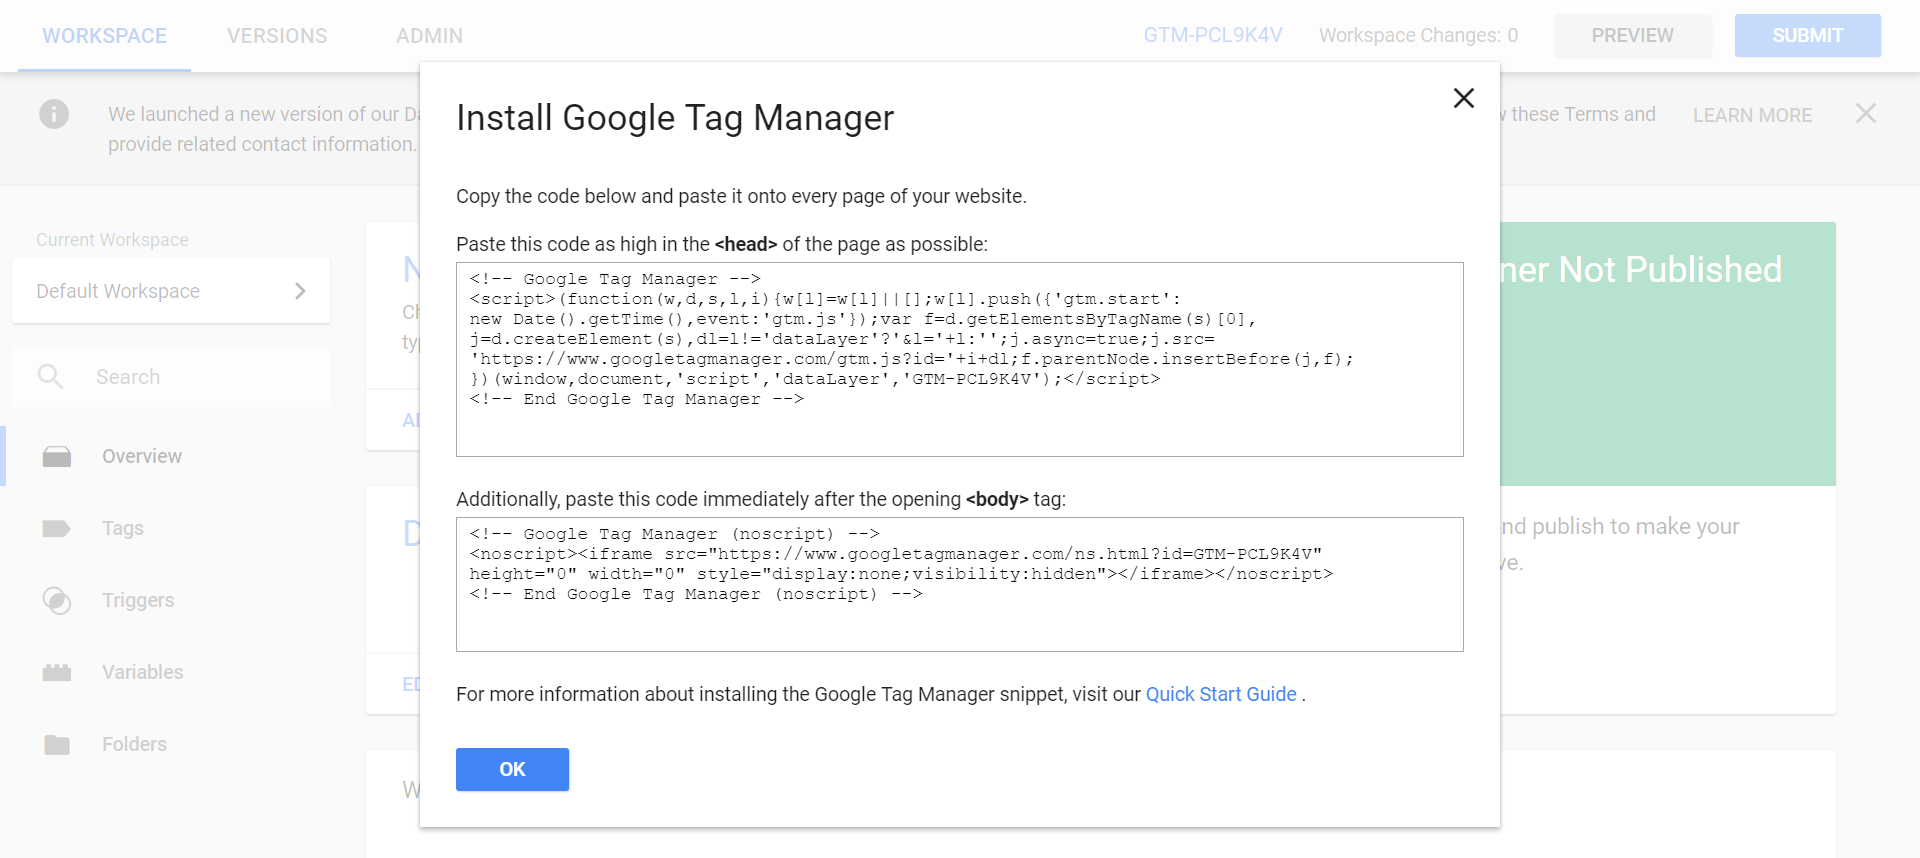
- In Google Tag Manager, select “Workspace.”
- Locate your container ID near the top of the window, formatted in the following fashion: “GTM-XXXXXX“.
- Click your container ID to launch the “Install Tag Manager” box.
- Copy the generated pieces of code and paste them into your website.
- Verify or troubleshoot your installation with Tag Manager’s Preview Mode and the Tag Assistant Chrome extension.
Add, update and publish tags
Once you’ve installed your container, you can start adding tags to it with the following steps.
1. In Tag Manager, select your account.
2. Click “Tags” from the navigation menu.
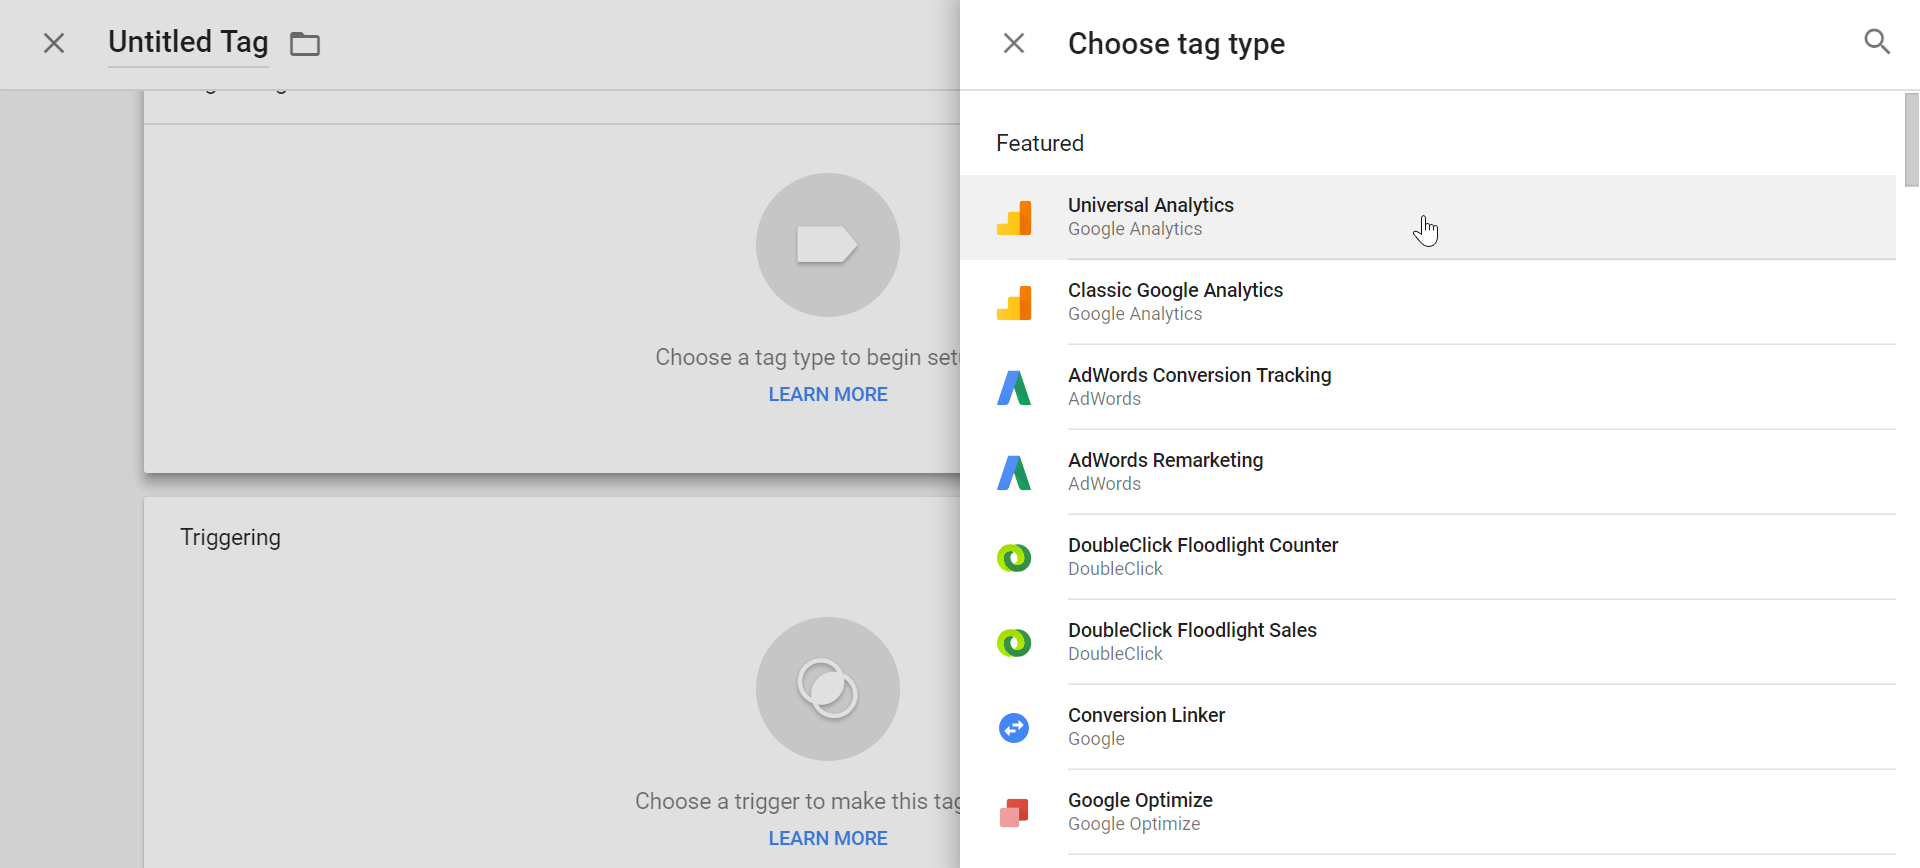
To add a tag: Click “New.” Select the tag type (for example, Google Ads Conversion Tracking) and specify triggers for when the tag should fire.
To edit a tag: Click a tag in the list and make changes on the “Edit Tag” page.
To delete a tag: Once you’re on the “Edit Tag” page, click the menu in the upper right corner of the screen and choose “Delete.”
3. Previewing gives you a chance to evaluate your tags, variables, and configurations before they go live. You can use the debugging option to see which tags fire as you use the site. When you’re on a page with unpublished changes within a workspace, click the arrow next to “Publish” to expose more options, then click “Preview.”
4. If all looks well, simply click “Publish” in the upper-right corner of the screen to begin publishing your changes.
Google Tag Manager example
Consider this hypothetical: If you wanted to track conversions, set up behaviorally-triggered emails, run ads on a particular page, and track it all with an analytics platform, you’d need tags from all those programs to do it. With Google Tag Manager, all you need is add this once:
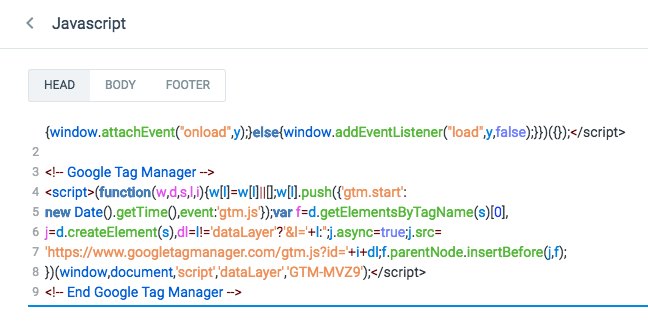
In the end, it makes maintaining tags much cleaner and easier for your team.
Start creating better, more robust user experiences
Not only will Google Tag Manager save you time and headaches, but it has the potential to make things better for your users, too. You’ll be able to easily add any software that improves personalization: email automation, live chat — even heat map software, which can give you the data you need to boost user experience. You’ll also be able to keep pages light by managing JavaScript, which will speed load times and keep users from bouncing. That, in turn, makes it more likely they convert. Start creating versatile and user-friendly post-click landing pages today with Instapage, Instapage Enterprise demo today.
See the Instapage Enterprise Plan in Action.
Demo includes AdMap™, Personalization, AMP,
Global Blocks, heatmaps & more.
